Tuesday, January 24, 2012

Sometimes Recipes will go Incredibly Right!

My last post was a Pinterest Fail but this post is a BIG FAT Pinterest PASS!  In addition to loving crock pot recipes, I also love simple baking recipes that don't require me to actually have the recipe up in front of me.  If I put the recipe up on my phone I need to keep refreshing so I can see where I am at.  I don't like lugging my laptop into the kitchen because I'm lazy and I don't own an iPad (Blasphemy I know!), so I just prefer things that I can read through once and put together without checking the recipe again.  With that in mind, below is my idea of a GREAT evening meal.  In fact, I am going to make this one again next week when we head over to our friend's house to meet their new baby girl.

Chicken Parmesan Bake
Degree of Difficulty: 2
Mess Factor: 3
Taste: 8
I would highly recommend this recipe for anyone who needs a quick meal, but doesn't have a lot of time to put it all together.  Since that pretty much includes everyone, that means this is a recipe for anyone who likes Italian food!  Below are step by step instructions but as always, I don't have pics for all of the steps.  The prep for this dish went by so quickly, I kept forgetting to take pictures!

This dish requires a total of 7 or 8 ingredients, depending on whether you like red pepper flakes.  Preheat the oven to 350 while you put everything together.  In a 13x9 inch baking dish pour 1-2 tablespoons of olive oil and 1-2 cloves of garlic.  Spread the olive oil and garlic around the bottom of the pan to ensure you have it all covered then top with red pepper flakes (optional). 

Next put lay in 4-6 chicken breasts and top with half a jar of pasta sauce (can you tell I really do NOT like measuring cups?).  Sprinkle in parmesan cheese and mozzarella cheese.  The recipe called for 2 oz of parmesan and 4 oz of mozzarella for this part, but I just eyeballed it.  Top the cheese with one 5oz bag of garlic croutons and more cheese (again it called for 2 oz of parmesan and 4oz of mozzarella but I just had fun). 

Place the dish in the oven for 35 minutes and voila!  Obviously check to make your chicken is completely done after 35 minutes and if not, cook longer, but this really shouldn't take much longer to cook. 

This is a pic of the finished product minus one serving.  Below is a close up of the serving on a plate. 

I probably cooked this a little longer than absolutely necessary but the chicken was really moist and I loved the crunch of the cheese and croutons on the top.  I can not recommend this recipe enough.  Please give it a try and leave a note in the comments section letting me know how it goes!

Lori

Monday, January 23, 2012

Sometimes Recipes will go Horribly Wrong!

I have blogged about almost all of the food recipes that I have tried off of Pinterest and up until Friday night every single recipe I have tried on Pinterest has been worth repeating.  Friday night resulted in the de-pinning of a recipe (Gasp!  Shock!  This is on the same level of cruetly as de-friending on Facebook)! 

Let me start off by saying that it is possible I did not follow the directions exactly, so this could be a user error but with that being said I still will NOT be trying this recipe again.  The end result was a flavor that is not a favorite in our family.  We had  a really hard time getting it down and there was a serious discussion about whether a Domino's pizza should be ordered.

Slow Cooker Orange Chicken
Degree of Difficulty: 6
Mess Factor: 6
Taste: 2
Let me start by explaining that I always get frustrated with slow cooker recipes that require me to cook anything prior to placing it in the slow cooker.  The point of slow cooker recipes, to me, is that you throw everything in the pot and turn it on.  This recipe required you to coat the chicken in flour and brown it in oil prior to placing in the crockpot.  Not really a big deal, but just a hassle, especially in the hustle and bustle of the morning.  Below is a basic walkthrough of the process along with comments on the final product:

There really weren't too many ingredients in this recipe, which is one of the reasons we decided to try it out.  The only ingredient you don't see in this pic is the chicken as it is off to the left waiting to be trimmed and cut into small pieces. 

This is a pic of my browning process.  I had a small bowl of flour that was used to coat the chicken.  It really doesn't take long to brown the chicken since it doesn't need to be cooked all the way through.  While I was browning the chicken, I made the sauce.

The sauce doesn't look like much, but it is predominantly orange juice concentrate.  If you really don't like orange flavoring (apparently I don't), then I would really recommend skipping this recipe. 

Place the browned chicken and the sauce into the crockpot and turn to low.  I made the mistake of cooking this for 6 or so hours since I made this dish in the morning.  If you do decide to try out this recipe, I wouldn't cook it for more than 3 hours.  This is a problem for me because I prefer to put everything in the crockpot in the morning and then forget about it the rest of the day. 

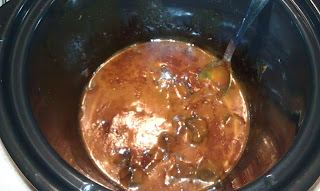
This is a pic of the end result.  Please note that this is after we had already served up some pieces and had it turned off for at least an hour, but the color is pretty true to how it looked in person.  At the end of the day, the dish just cooked too long in the crockpot so the chicken was really dry. 

Oh well, not my favorite recipe but they can't all be winneres.  I promise to post another recipe either today or early tomorrow with a Pinterest recipe that did work out well. 

Lori

Friday, January 20, 2012

She Will Continue to Cook with Cream Cheese

As some of you are aware, I have a LOT of cream cheese to use before the end of February and I have been searching for recipes that will allow me to deplete my stash.  I didn't try out as many new recipes as I like this past week due to a wonderful supply of homemade raviolis, but I was able to get in one slow cooker cream cheese chicken chili.  Check out my review and the pics below!

Slow Cooker Cream Cheese Chicken Chili
Degree of Difficulty: 1
Mess Factor: 2
Taste: 9
We really LOVEd this recipe and will definitely add it to the mix.  This recipe is as simple as pouring all of the ingredients into the crockpot, turning the crockpot to low for 6 or so hours, then serving!  I always get a little frustrated with slow cooker recipes that require me to do any cooking prior to the adding to the slow cooker, so this was perfect for me.  Check out pics of the ingredients, process and final product below:
Please note that the above picture is missing the 2 frozen chicken breasts that are already in the bottom of crockpot.

Below is a pic of all of the ingredients minus the cream cheese.  I really did just open and pour the cans and spices into the crockpot. 

Mix up all the ingredients and add a block of cream cheese to the top.  Set to low and cook for 6 or so hours.  Right before dinner, use a fork or spoon to shred the chicken and stir.  
I served this with tortilla chips for dipping as it was pretty hearty.  Even my daughter loved the chicken although she did eventually have to stop eating because there is a little bit of a kick and she is not a big fan of spicy. 

Definitely try this one out and let me know how it goes!

Lori

Friday, January 13, 2012

She will Make Breakfast!

I actually really love to cook and bake, but I am AWFUL at taking pictures of my tasty creations.  This is probably due to the fact that while my food usually tastes good, I don't perform so well on the presetation portion.  Since cooking the recipes I find on Pinterest happens almost daily, I resolve to be more dilligent and take pictures not only of the finished product, but also of the cooking/baking process! 

While time doesn't always allow for it, I do love to make breakfast.  Some of my favorite family memories include breakfast on Saturday and Sunday mornings.  I don't have a ton of breakfast recipes pinned, but I have definitely been make a lot of the recipes I do find!

Since I don't have pictures of everything, some of the items below won't contain pictures, but they will contain reviews of the recipes and tips for anyone looking to try them out.  I will also include a degree of difficulty, a mess factor, and a taste grade, all on 1-10 scales.  Plus, I will always link back to the original poster so the owner gets the credit and you can easily find the full recipes!

Cinnamon Roll Pancakes
Degree of Difficulty: 5
Mess Factor: 7
Taste: 9
I made these pancakes for Boxing Day (December 26) breakfast and I thought they tasted great.  They were a great consistency and the cinnamon glaze really did make syrup unnecessary for most people (my husband prefers to drench all pancakes in syrup).  Not sure if this was supposed to happen, but I liked how the glaze carmelized and got a little crispy, adding a different texture to the dish.  The cinnamon glaze does add to the mess factor as it can ooze out of its plastic bag when not in use.  All in all, definitely worth another try!

Pumpkin Pancakes
Degree of Difficulty: 3
Mess Factor: 4
Taste: 7
I must preface this review by saying that I LOVE all things pumpkin!  I also need to let you know that this recipe was originally for pumpkin cinnamon roll pancakes, basically the recipe above but with pumpkin in the pancake batter.  I didn't want to deal with the cinnamon glaze again (pure laziness), so I just made the pumpkin pancakes.  I am pretty sure this recipe is missing the sugar as the glaze adds the sweetness, so it was definitely lacking in that department.  Even with that said, I thought the pancakes were very fluffy (more so than the original recipe) and were very tasty.  Adding syrup pretty much added the necessary sweetness back in, so I really didn't notice the lack of sugar too much.

Cream Cheese Banana Chocolate Chip Bread
Degree of Difficulty: 4
Mess Factor: 4
Taste: 8
One of our good friends gets Kraft cream cheese for free.  They had a case in their garage and for Christmas presented us with 12 packages of cream cheese.  This means that I have been making a LOT of dishes with cream cheese and this might be one of my favorite.  The original recipe is for Cream Cheese Banana Nut bread, but I'm not a big fan of nuts and I LOVE chocolate, so I used one cup of mini chocolate chips instead of chopped pecans.  I'm not sure if the change in chocolate caused the loaves to fall or if I put them away too early (they came out of the oven around 10pm and I was tired).  Either way, the end result was very tasty and I was able to catch one picture before the last of the 2nd loaf was eaten!

Avocado Eggs Benedict with Chipotle Hollandaise
Degree of Difficulty: 8
Mess Factor: 8
Taste: 10
I LOVE chipotles and I LOVE Eggs Benedict, so I thought this was a perfect combination.  Be forewarned the degree of difficulty comes from poaching eggs, which is a skill I have yet to master.  I do own an egg poacher (skillet with four little cups for the eggs) and that makes it easier, but I never know how long to cook the eggs to get the right consistency.  Plus, this uses a LOT of pans/skillets/pots, so it was kind of a pain to clean up but definitely worth it!  So good in fact, that I may make again this weekend when my parents come to town!

Buttermilk-Blueberry Breakfast Cake
Degree of Difficulty: 3
Mess Factor: 3
Taste: 10
This cake is AMAZING!  Both my husband and I were raving about it the moment it hit our lips!  I have already had thirds and I only made it this morning.  If you have a brunch or small crowd for breakfast, this recipe would be perfect.  It fits into a 9x9 inch pan so it doesn't make a ton, but more than enough for a small breakfast gathering.  We will definitley be adding this in to the breakfast rotation!


Good luck with all of your cooking and baking this weekend!  I know I have several items on the agenda for this weekend, so I will plenty to post about next week.  Plus, I have one sewing project and one design project I am working to finish up tonight!

Lori

Tuesday, January 10, 2012

She Will Want to Renovate Her Kitchen!

Unfortunately, due to budget constraints, I need to go in small steps.  First step...updated bar stools! 

We bought 2 bar-height chairs for $25 at a garage sale this past summer, knowing that we would eventually cover the cushion with new fabric.  This is an incredibly easy project that really only includes the cost of fabric, which you can usually buy on sale or with a coupon at your favorite craft/fabric store.  In this case, I chose an outdoor canvas that was 50% off at my local JoAnn fabrics.  I decided on the outdoor canvas as I wanted something a little more durable that would stand up to a wet cloth wiping it down. 

Materials
  • 1 Yard Fabric (Obviously this will depend on how many cushions you are covering and their size, but I bought 1 yd to cover both cushions and still have plenty leftover)
  • Staple Gun
  • Stools/Chairs
Completion Time: 30-45 minutes

Below is a before picture of the chair.  You can't tell from the picture, but the fabric is stained/marked up with food/crumbs I am unable to vacuum or wipe off. 

My wonderful husband unscrewed the cushions from the chairs earlier in the day because he worries about me lifting, but I'm pretty sure anyone could do this.  I laid out the fabric on the dining room table and placed the cushion on top.  I just cut around the cushion so that I would have enough to wrap over the edge, not a lot of measuring or precision involved! 

Once the fabric was cut, it was time to use the staple gun.  This is my first time with a staple gun, but it was really easy and I must admit, a lot of fun!  My hubbie helped me hold the fabric tight while I went around the edges and stapled down fabric. 

It's not very pretty, but no one is going to see the bottom of the cushion, so I wans't really worried about how the final product would look on the bottom.

After screwing the cushion back into the chair, we have an updated chair for the kitchen island!  I think it is a vast improvement over the previous black canvas.  It's a lot brighter and will bring in a nice pop of color to the kitchen.  Plus, the whole project took about 30 minutes and cost me about $10!

Lori

Monday, January 9, 2012

She will become OBSESSED!

I have decided to start a blog to better chronicle my experiences/adventures with Pinterest and other domestic/crafty endeavors!  I was putting updates into the family blog that I created, but have realized that this is limiting updates on my actual family.  This blog will focus on the craft/sewing/recipe challenges that I take on after receiving inspiration via Pinterest or favorite blogs. 

Pinterest has become the cookie to my mouse, hence the name of the blog.  Here is hoping I can keep everybody entertained and can garner more than 3 faithful followers!

Lori